

The holidays are the busiest shopping time of year. How do stores attract throngs of customers? By advertising good deals, offering must-have items and creating a smooth shopping experience.
Just like a brick-and-mortar retailer, the charity auction is your organization’s “one night only” storefront. To motivate bidders to stop, look, and buy, it’s important to create engaging, exciting auction item displays.
Here are the Top 10 Do’s and Don’ts of displaying and describing auction items:
- Do pay attention to formatting.
- Do use multiple displays.
- Do include striking imagery.
- Do include the fine print.
- Do thank donors and underwriters.
- Do keep it simple.
- Don’t go over a certain length.
- Don’t use the wrong images.
- Don’t waste space.
- Don’t clutter the display.
Read on for easy strategies to make the most of every auction item display and avoid common pitfalls.
Displays Form the First Impression
There’s a reason retail stores and shopping malls put so much effort into elaborate displays around the holidays. The display shapes the all-important first impression of an item!
At a charity auction, this has arguably the same impact on whether or not people place a bid as the quality, nature and pricing of the item.
Without further ado, here are tips for creating sleek, professional displays that get bidders to join in on the fun.
1. ✓ Pay attention to formatting.
Every item needs to be accompanied by a display. The tricky part is making a display broad enough to highlight only the most exciting aspects, yet detailed enough that bidders know exactly what they’ll get if they win.
Whether you’re listing the contents of a gift basket, details of a travel package or technical specs of the latest smart TV – keep the description concise but accurate.
To make the most of limited space and time, convey information using punchy bullet points. This prevents bidders from having to linger over one item for more than 30 seconds, creates a smoother shopping experience and garnerns more bids.
Another tip: Don’t clutter the page visually. The more white space you can leave, the cleaner the display will look.
2. ✓ Use multiple displays.
We recommend using a mix of print and digital displays. Why?
Digital displays help auction items “leap off the page” and make the shopping experience more interactive overall. These are typically live auction PowerPoint slides; you might have TV screens or large tablets scattered around the silent auction as well.
In addition to multiple methods of display, put displays for your top items in multiple locations.
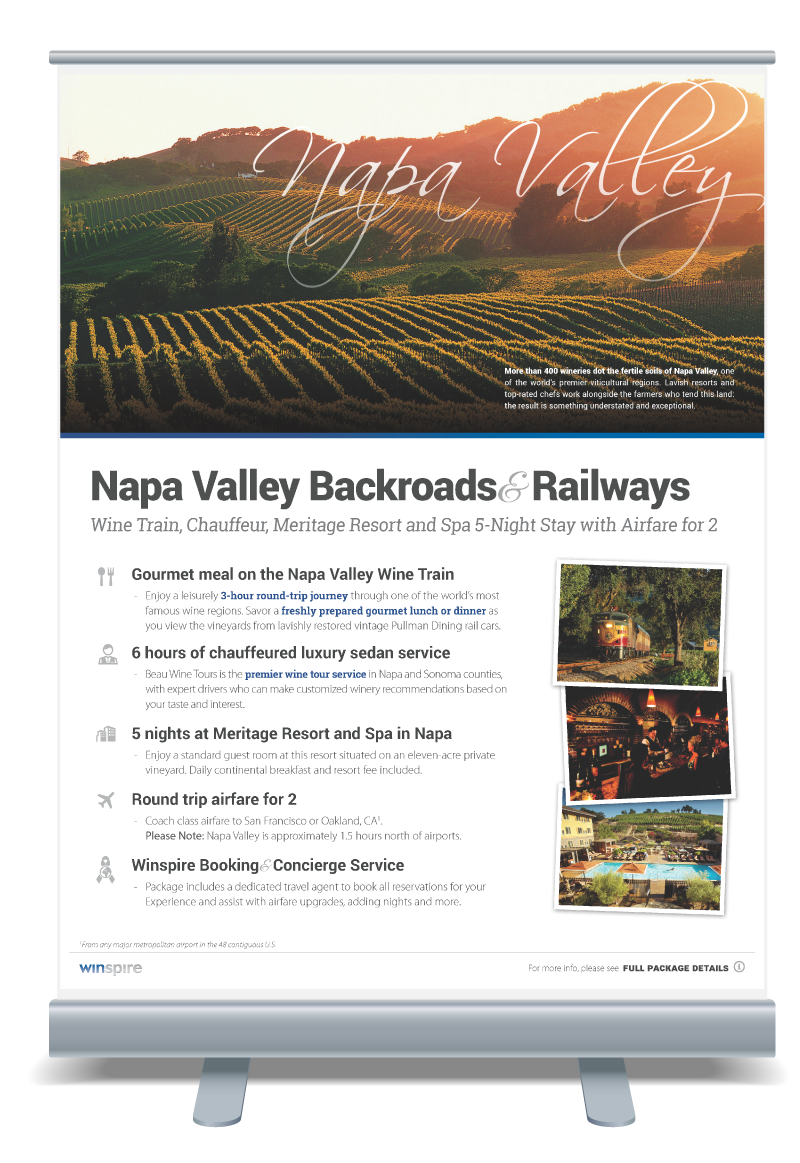
One creative example: If you’re auctioning off the top-rated Napa Valley Backroads & Railways Experience in the live auction, try leaving a poster or framed display at the bar. It’s sure to catch the eye of wine-lovers and spark discussions among friends and couples, so they’re ready to bid when the time comes.
3. ✓ Include striking imagery.
For a silent auction display, include 1 to 2 high quality photos per item. The donor may provide images, or you can search online to find relevant, striking, hi-res photos to include.
This is especially critical for intangible items like dining, sports and entertainment tickets, spa services, travel packages: things that can’t be physically displayed.
During the live auction, you’ll want to set up a scrolling PowerPoint with amazing photos of the experience or item on every slide. Additionally, if you can get it, a 30-second video is a priceless asset that primes the pump for bidding.

4. ✓ Include the fine print.
In addition to listing what you get, include the fine print: expiration dates, blackout dates, valid redemption dates and any other restrictions.
Does the winning bidder have to book their trip within a year? Does a restaurant gift certificate work at certain locations? Are vouchers to a sporting event blacked out on certain days?
Note that in a PowerPoint slide, you wouldn’t include all the fine print, since it would be difficult for most guests to read. With discretion, include the major restrictions and details that would reasonably affect a guest’s decision whether or not to bid.
5. ✓ Thank donors and underwriters.
It’s always a good idea to acknowledge the individuals and businesses who donated auction items and underwrote costs. Donors in attendance will be pleased to see their name or logo on display around the venue, and this positive experience will make it that much easier to facilitate a long-term relationship.
While procuring or soliciting items, be sure to mention the different opportunities donors and underwriters will have for publicity – like being printed on the donated item’s displays.
{{cta(‘f2a7ad66-bc37-4f6f-ac57-1560c652588b’,’justifycenter’)}}
WEBINAR: It’s Beginning to Look a Lot Like Auction Profits
What about the rest of the tips: keeping it simple and concise, avoiding wasted space, clearing visual clutter and more?!
Winspire teamed up with Greater Giving for a webinar all about proven best practices to frame and position every auction item for success. Learn to:
- Write engaging auction item descriptions
- Design promotional materials (like display sheets and live auction slides)
- Promote items via email, social media
- Increase revenue with pre-event online bids, and more!
Get all the tips by requesting access to our Winspire Webinar library. Fill out the form on this page and receive immediate access to our library of helpful, educational videos.
{{cta(‘2c2afed8-70df-494b-8204-3eb3c111af11′,’justifycenter’)}}